Monday 31 October 2011

Challenge Week 5: Metallic Nails!

It's time for week 5 of my 52 Week Challenge, and this time the theme is 'Metallic' I don't seem to have many metallic polishes, so there wasn't much choice for me (and I'd quite like to get my hands on Barry M's new foil effect polish- it looks awesome!) but I really love the polishes I do have. Somehow these two wonderful shades have never made it onto a NOTD post, now that I've remembered how much I like darker shades on my nails I'm sure I'll be using it a lot more :)


I used two No7 Polishes for this look: Night Silver is the beautiful gun-metal shade I used on all but my ring finger. I think I could have just about got away with one coat of this- it's very highly pigmented and applies really smoothly. To add a little extra dimension to the manicure (you know me, I rarely leave it at just one polish!) I decided to have an accent nail and I chose another No7 polish- Beautifully Black.

Beautifully Black is another lovely shade- it's a black with lots of really tiny silvery sparkles/ glitter particles (it's another contender for the background of Galaxy nails, which I really MUST try soon- it's not in the challenge until April!) This took two or three coats on my ring finger to become opaque (the black base isn't too well pigmented) but it is definitely worth the effort- the sparkles are so densely packed- I love it!


No 7 polish in Night Silver and Beautifully Black.


What are your favorite metallic nail polishes? Does anyone have the Barry M foil polishes yet? (I'd love to know what they're like!)


                                                                                                    xGretalRabbitx

Sunday 30 October 2011

Harry Potter Cake!

It was my sister's (14th) birthday on Tuesday (sucks to have to go to school on your birthday, my birthday was always smack-bang in the middle of the summer holidays!) so last night she had a (very noisy) birthday party- there were only 7 girls in the house, but they managed to make so much noise, and I awoke to a complete wreck in the living room this morning... but I think they all had fun! :)

Recently she has become a teency bit obsessed with all things Harry Potter after I 'made' her read the books over the summer, (which is definitely not a bad thing- they're awesome books, though she does like the films too...) so naturally she wanted a Harry Potter themed cake. We went through several completely unrealistic ideas that I would clearly never be able to pull off...


I am definitely not a master cake decorator, but I tried my best- and between me, my sister and her two friends (she roped them into helping decorate our house before the party) we made this cake!


Harry Potter!

I used my Super-Simple Cupcake recipe; using 4 eggs, I baked it in a (fully lined) square cake tin for approximately 30/35 minutes at 170C. That recipe is so versatile, yet still utterly foolproof :)

There are very few things I buy instead of making from scratch- and fondant icing is one of them, sometimes life is just too short! I bought a 500g pack, and split it into several chunks. The largest chunk remained white- which I rolled out quite thinly, then covered the cake with a thin layer of jam (to help the icing stick) and smoothed the rolled icing over it, trimming off the excess with a knife.

Then we made several colours with various food colouring (we learned a lot about the colour wheel) naturally we had to have a lot of pink (I don't think Amy will ever grow out of her little-girl-pink phase)  brown took a long time (and LOTS of food colouring!) and rolled them out thinly. We had alphabet shaped cutters to help with the lettering, and my sister did most of Harry and his broom, though I did the most important part- his scar!

To attach the decorative icing to the white base I wet the white icing a little (with warmish water) and placed the decoration on the top- and once the water evaporates off, the two pieces of icing will have stuck together.

If I hadn't have told you, would you have guessed it is Harry Potter?

How are your cake decorating skills? Got any tips for me?


                                                                                        xGretalRabbitx

Saturday 29 October 2011

Review: Lucas' Papaw Ointment.

Yep, it's time for another lip balm review! Lucas' Papaw Ointment  is something I picked up in my travels last year (thanks to the recommendation of several of my Ozzie friends and relatives) I think it was $5 (around £3.50) for 25g. It is available in the UK via online shops (this shop is the cheapest I could find- 25g is £5.40 inc. shipping) but if you're lucky enough to live in Australia the stuff is everywhere!


This ointment is designed for use on just about anything: burns, chafing, rashes, insect bites, nappy rash, cuts and cracked or chapped skin. I mainly just use it on my lips but I've found that it's great for eczema and insect bites (not that I get any in England, but I encountered LOTS in Fiji and it was awesome then!)

It is made from fermented papaya/papaw (a delicious tropical fruit) and as far as I can tell the only other ingredient is a small amount of preservative. It smells really lovely (nice and fruity) and although it's an odd yellowy colour in the tube it applies clear- much like Vaseline. The texture is similar to Vaseline too, it's quite thick and you only need a very tiny amount to cover your lips (or anything else you want to use it for) and it does give quite a glossy look- ideal for no-fuss, but healthy-looking lips.  

As expected for something that claims to be (and definitely is!) so multi talented, this balm is lovely- it's very moisturising, it provides a nice barrier to the elements, it speeds up healing and soothes itches.

The only issue I have with this ointment is the packaging, the larger sized pots are fine (available in 75g and 200g) as they are just screw-tops, but the tubes come with an odd triangular shaped plastic seal that slots into the triangular indent in the lid. you have to use the lid to screw off the seal- and it's really hard! It took 3 tubes and 2 shop assistants in Target for me to get one open, and after all that I'm left with a rough edge on the opening (it's not sharp or dangerous, but it IS annoying) I honestly don't see why it's designed that way (answers on a postcard?) and I wish they could change it somehow. Next time I purchase I think I'll be buying a large pot and decanting it into a smaller one- much easier than wrestling with the tube!


Yet another lip balm I absolutely love (honestly, there are some that I don't like- but I don't own them anymore!) if you can get your hands on this for a reasonable price I definitely recommend it- and my Ozzie cousins swear by it for nappy rash and insect bites-

Have you ever seen this? Or something similar? (it looked really strange to me when I first saw it!)


                                                                                                           xGretalRabbitx

Friday 28 October 2011

Getting Crafty: make your own microwave warmers :)

With the weather getting colder and colder I'm trying everything to keep warm, and as my dad often refuses to allow the heating to go on, I'm starting to get creative...

I had a microwave warmer in the shape of a pig (he was a birthday gift years ago) but the grain inside gradually cooked as I used it so much, and my hamster kept trying to eat him (it clearly smelled like food) so after some 'research' I took out the old grain and replaced it with some mung beans- which made me realise how easy it would be to make a whole new one for myself too, and I thought I'd share the instructions with you.

You will need:

Material (the material I'm using is actually from an old pair of pj's that were ruined by spilling candle wax all over them....) ideally use something quite soft, but sturdy (you don't want it ripping and spilling out your filling!) fleecy material might be nice.
Needles or a sewing machine
Thread- preferably in a colour to match your material (I just used white)
Pins (to hold the material in the right place when you're sewing)
Filling- you can use most dried things: like rice (regular long grain, not quick cook), lentils, wheat (which is what most warmers you can buy in shops use) beans etc. If you're unsure if something will work- give it a quick test in the microwave and see if it retains heat. I think rice is the cheapest option, but I chose mung beans as I found some old ones in the pantry (I hate to think how old they are...)


1) I want to make a rectangular hand warmer that's about 20/25cm by 10cm, so I start with a peice of material about 30cm by 25cm- this give me plenty of seam allowance. You can choose any shape or size you want (tiny ones would be good to hold in your hands, big ones can make great heating pads to replace hot water bottles in your bed) just make sure you allow for seams when you cut out your material.


2) Fold the material in half to make the rectangle shape I want- make sure the outside is facing inwards (this means all the messy stitching is on the inside) and pin along the edges where you need to sew.


3) Sew along the top edge of the rectangle, then trim off the excess material (this will stop the seams being too bulky)


4) Re-Fold the material so that the top seam is now flat in the centre (I prefer to do this as the pouch doesn't have such pointy corners, but you don't have to do this step if you don't want to) Then re-pin the two open edges.


5) Sew up one edge completely, then sew the other end up about 2/3 of the way along and trim off any excess material.


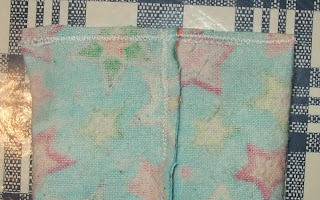
Sewn all the way along

Sewn 2/3 of the way along

6) Turn the pouch inside out (pull it through the small hole you left on the side)


7) Fill the pouch just over 2/3 full with your chosen filling. If you don't have a funnel you can make a little cone out of paper that works just as well. (You may want to do this step over a tray- or you may be finding mung beans all over the floor for the next month!) I find it best not to fill it completely as it heats more evenly, and allows the warmer to mould to the shape you want easily.


The mung beans I used.

High-tech filling system...

8) Sew up the last little hole: fold the edges inwards to give a neat edge, and pin it together, then sew it up. I used a giant plastic paperclip (I find some very odd things in my house sometimes...) to hold the beans at the other end of my pouch- you can use some thread/ribbon etc. to do the same (it stops the filling getting in the way)


See, how easy was that? I suppose there is a fair amount of sewing involved, but it's all very simple stiching (nice straight lines!) and for me the most complex part was filling it... even with a funnel I somehow spilled mung beans all over the place... I've hoovered but I keep finding them hiding in corners!

I think these might make some rather cute gifts too - you can add ribbons or other decorations to them to make them extra pretty, and I've heard that you can put dried lavender or pot pourri etc to make them smell nice once heated.

I hope these instructions were easy to follow (I'll be happy to answer any questions- leave me a comment or drop me an email)

I would love to know if you make one (let me know!) and and I hope they help you stay snuggly and warm during the winter months!


                                                                                            xGretalRabbitx

Thursday 27 October 2011

Nail of the Day: 17 Magnetized Nail Polish- Lilac :)

I posted yesterday about a little haul which mainly consisted of 17 products, and one of those was the Magnetized polish in Lilac. I'm really glad I caved and got this shade as well as the Blue Magnetized polish, I really like this colour, it's such a lovely plummy purple (goodness knows why it's actually called lilac...) :)

The formula seems a little thinner than the blue one, it took two coats whereas the blue only needed one (thickish) coat, but that's almost to be expected as it is a lighter colour. There are no sparkles/glittery particles in the purple like there are in the blue either, but I love this shade so much I don't mind! I think this one worked better with the magnet- perhaps because of the thinner formula? (though I suppose this could be down to me being a little more experienced with the technique!) and the waves are more apparent.

Again this polish is very awkward to photograph, and my cuticles are in not-so-great shape, and I think I smudged a nail... so overall they're not my best NOTD pictures, but I love this polish and I couldn't not share this manicure with you :)


What do you think of the magnetic nail polish trend? And do you know if there's anywhere that sells individual magnets with different patterns on?


                                                                                                xGretalRabbitx

Wednesday 26 October 2011

Yet another little haul :)

I suppose it's been a fair while since I've bought so many new items (my last haul was 1 nail polish and a whole load of sponges!) so I'm kinda proud of myself- as there's been so many new things out recently that I've been rather interested in.

First stop on todays shopping trip was Boots (it just happens to be the closest to the car park...) where I decided to take up the free gift with purchase of two 17 items. I needed a new mascara (my 17 Lash Defining Mascara is running out, and getting old and flaky- though it has lasted about 4/5 months) and I chose the Va Va Voom Volume Mascara (In Brown/Black) on a bit of a whim- I've not heard of it before. It has a large bristly brush and quite a dryish formula compared to the Lash Defining Mascara- I've only used it once but so far I like it, I'm sure I'll post a full review once I've used it more :)


The other 17 product I got is (I think somewhat predictably) the Lilac Magnetized Nail Polish. I love the effect my blue one gives and I kept seeing the purple one and purple is my favorite colour- I couldn't resist :) I've painted my nails with it already- I'll show it to you properly in a NOTD post tomorrow.


So with my purchase of the 17 mascara and nail polish I got a free gift (I'm sure you've seen it before- so many other bloggers have it too!) The Femme Noir collection is made up of 3 full sized products: a Liquid Liner in Black (usually £3.99), an Ultimate Volume Lip Gloss in Very Berry (£3.99) and a glitter eyeshadow in Night Sky (£3.89) which comes to a total of £11.87 worth of free items.


I really like the lip gloss, it's a lovely deep berry colour- not necessarily a shade I would've chosen myself, but it's perfect for this time of year, and I'm glad it's forcing me to branch out into berry shades. The eyeshadow is also really nice, a deep almost brownish grey with some silvery glitter, another seasonal essential. The liner is probably not for me, I've never been able to work with a liners like this- I'll try again as I quite like the brush of this one, but I may end up giving it to my sister.

Next stop was Superdrug, where I purchased the Garnier Miracle Skin Perfector B.B. Cream. After trying the sample out for several days- I really liked it! It definitely blends into my skin tone nicely (no hint of orange, which is what I was afraid of) and although it doesn't hide blemishes or redness, it does 'blur' my imperfections. Superdrug has it on sale for £7.99 (and with my £1 voucher from the sample I received I paid only £6.99!) I'm sure I'll have a review of that soon too :)


Lastly I popped into The Body Shop (they're having a bit of a sale- well worth a look, especially for some Christmas present bargains!) and spotted an Eau De Toilette that I've been frequently sniffing for months on sale for £4.50 (for 30ml). It's quite a departure for me actually- this is quite a sweet and floral scent (if you've read any of my perfume collection reviews you'll know I usually prefer much deeper scents) though it's not at all sickly or sugary like a lot of other scents, and on my skin it (as always) it does become a little more musky. For an Eau De Toilette it also lasts really well on me- I love it! :)


What have you been buying recently? Have you got the 17 free gift- if so what do you think?


                                                                                            xGretalRabbitx

Tuesday 25 October 2011

Review: The Body Shop Lip Balms.

I think it's about time for another lip balm review as part of my lip balm collection series- and it's the turn of The Body Shop. They have several different types of lip products (including some rather nice looking new 'lip roll ons' which I may have to purchase) and I have two varieties of their lip balm- 2 from the 'Born Lippy' range, which are fun and fruity with a nice glossy finish, and 2 Christmassy lip balms that are actually very similar to the lip butters that are available all year round.


Born Lippy: Raspberry and Mango Peach.


The two Born Lippy lip balms I have are Raspberry and Mango Peach. They both smell lovely and fruity- like The Body Shop's Body Butters the scent is quite natural- like there could actually be some real raspberry in there. Although they come in all kinds of fun colours (depending on the scent) this doesn't translate onto the lips which I quite like (it means you don't have to be careful with your application) but it does give your lips a nice glossy look to make your lips look fuller and healthier.

Despite being more of a gloss, they are also very moisturising- essentially a slightly more moisturising, un-tinted version of the e.l.f. studio conditioning lip balms! The Born Lippy lip balms cost £2 each, and there is 9g in each pot which I think is reasonable considering how yummy smelling and moisturising they are (in fact they're actually a lot better value than the e.l.f. ones- quite unexpected really). The packaging is nice and simple, and the fact that they're clear makes it easy to tell them apart even without the label.


Lip Balm in Spiced Vanilla, and Cranberry Joy.

The Christmas lip balm/butters are very different to the Born Lippy balms, they have a lovely creamy texture- basically a Body Butter for lips- and are very richly moisturising. They smell absolutely amazing- they just make me think of Christmas (which is possibly not great for using in the height of Summer, but I don't really care!) I think Spiced Vanilla would be awesome in candle form (it probably already is somewhere) There is no tint to these balms- and because of the super-creamy formula you actually have to be a little careful you don't apply too much or you'll end up with odd creamy lips (not a good look)- but it does leave a little sheen on the lips; not glossy like the Born Lippy ones, but not matte either. 

This is another balm (like Carmex) that I love for treating dry and chapped lips (3 guesses why these were brought out for Christmas!) and as a nice 'before bed' lip conditioner- they are so richly moisturising :) Even with the rich creamy formula it doesn't feel heavy or gloopy on the lips, it's very smooth- though it does take a while to sink in (which I think is a good thing, as it feels so lovely)

Annoyingly I can't remember how much I paid for these lip balms (despite the fact that I actually blogged about receiving the Cranberry Joy) but I think they were originally a similar price to the Lip Butters (£4) and these tins contain 13g.- one tin will last forever as you need so little per application (again, very good value for such a lovely lip balm!) The packaging is also very good- I love the Christmassy design on the lid- and it's nice and practical.

Overall I really recommend The Body Shop for lip balm- not only do they smell delicious (like most things in the shop!) but they are really moisturising and (somewhat surprisingly) very good value.

Do you have any Body Shop lip products? What do you think?


                                                                                                    xGretalRabbitx

Monday 24 October 2011

Challenge Week 4: Halloween!

So we're onto week 4 of the 52 week nail challenge (nearly a whole month!) and this weeks theme is Halloween. Much as I'd like to draw some awesome designs on my nails, I can't even draw with a pencil, let alone a brush... so I went with a bit of a mish-mash of textures and patterns in some fun Halloweeny colours :)


I used a selection of colours for this- I used 2 coats of Wet 'n' Wild Orange Creme as a base (I have no idea where I got it from, I've had it for years) on four of my nails, and 2 coats of e.l.f. Metal Madness on my ring finger. I then used the Barry M crackle on my thumb and little finger, and Glitter Glam on my index finger and over my little finger. I used the spiders web from my m43 plate (which you can see here) to stamp a few webs on my middle finger, then I topped off all my nails with a topcoat (the lovely Sally Hansen Insta-Dri)


Wet 'n' Wild Orange Creme, e.l.f. Metal Madness and Glitter Glam,
Barry M Black Crackle and e.l.f. Black.

 I really like doing mish-mash-nails (I did a lovely greenish medley a while back) because I can try out lots of techniques and looks in one manicure, and it looks so fun! (It also looks like I spent longer and made more effort than I might have done...)

Are you doing any Halloween themed nail art this week? I'd LOVE to know if any of you are joining in with the 52 week challenge- leave me your blog details and I'll check it out :)


                                                                                                xGretalRabbitx

Sunday 23 October 2011

Christmas Cake!

I know you might think I'm a little crazy to be posting a Christmas Cake recipe in October... but there is a very good reason! This cake needs to be baked in advance and 'fed' with brandy for several weeks before decorating and eating :) I have fond memories of my mum randomly announcing sometime in October that it was time to make Christmas cake and puddings- both of which I absolutely LOVE eating (it's seriously one of my favorite foods!)- and for me it marks the true beginning of the festive season :)

I've never made a Christmas cake on my own before- my mum always did it, and last year I was travelling until Christmas eve so I sent many frantic emails to my sister with strict instructions to get my grandma to make them for us- so this time has been a bit of an adventure for me, I had to adapt the recipe (which mainly comes from an ancient recipe book- it's yellowing and no longer has a cover) to what I know my mum did (but never bothered wasn't to write down!)


You will need:

200g butter
200g soft brown sugar
200g plain flour
1/2 teaspoon ground nutmeg
1 teaspoon ground mixed spice
4 eggs
600g currents/raisins/mixed dried fruit/sultanas(whatever combination you like! I used mostly currents and mixed dried fruit)
50 chopped glace cherries
50ml brandy (plus extra for 'feeding' later on)


1) Place the butter and sugar into a bowl (use a big one, there is quite a lot of mixture by the end!) and beat together until light and creamy.


2) In a separate bowl weigh out the flour, and add the nutmeg and mixed spice.


3) Place the eggs and a little flour (around a tablespoon will do, this supposedly prevents the mixture curdling) into the bowl and mix together with a spatula/spoon.

4) Add the brandy and another small amount of flour and mix. Then add your fruit, glace cherries and flour and stir (it's good luck for everyone in the family to have a turn at stirring!) until the mixture is well combined (it might take a while, there's a lot of fruit)


5) Spoon the mixture into a lined tin, if possible leave a little dip in the centre of the cake- this will help your cake keep a flat top when it's cooked so it's easier to decorate. Bake at 140C/275F/Gas mark 1 for 4 and 1/2 hours (yes... really... though I think mine was ready after about 4hrs 20 minutes- I have a fan oven so it's a little faster)


6) Leave the cake to cool for a while in the tin, then take it out and peel off the lining, then leave it to cool on a rack.


7) When the cake is completely cooled (because it's so dense it might take a while) prick the top with a skewer several times and drizzle about a tablespoon of brandy over the top, allowing it to sink into the holes.


8) Wrap your cake in greaseproof paper, and then with foil (all nice and airtight) - a delicious parcel- then store in a cool dry place until you're ready to decorate and eat.


9) You can 'feed' the cake every week with another tablespoon of brandy drizzled over the top, you may need to make more holes with a skewer if it doesn't sink in quickly. This 'feeding' process helps keep the cake moist and rich, don't worry it wont actually taste alcoholic!


Despite the long cooking time and really long 'feeding' period, the cake is actually very easy to make :) And I really recommend making your own if you like Christmas cake as much as I do, it is SO much better than shop-bought cake, plus it's fun to decorate! I'll do another post closer to Christmas showing you how I marzipan, ice and decorate it :)

I'm feeling all Christmassy now, only 63 days to go!


                                                                                                xGretalRabbitx