Wednesday 30 November 2011

Review: Sanctuary Spa 5 Minute Thermal Detox Mask.

I've had this little sachet for quite a while now- it was originally part of a gift set someone in my family got for Christmas, eventually it wound up in my drawer... Anyway I finally got around to trying it out for the first time a couple of weeks ago, and I am SO glad I did, I love it!


I've actually used it twice now, and I've got enough product left from the 15ml sachet to get a third use out of it. You can purchase 15ml sachets for £2.03 or 100ml tubes for £10.20 from Boots.


First of all, I'll be brutally honest; it's not particularly appealing to the eye or the nose: it's a grey colour with tiny black flecks, and it smells really rather odd- I can't quite put my finger on it but it vaguely reminds me of raw potato (the green, under-ripe kind)... However, you should really try to get past those little issues because the mask is brilliant!

I know I have dry and sensitive skin, not the oily skin the mask is more targeted towards, but I am prone to blackheads (caused by blocked pores) so the mask works really well for me; it provides a deep clean that is also very gentle. It claims that the warmth helps to open pores and the charcoal and kaolin draw out impurities- and while I'm not 100% sure that it's all true (as a science graduate I take any 'scientific claim' in the beauty industry with a huge pinch of salt) my skin definitely looks and feels clearer after using it. The mask doesn't irritate my skin, in fact it seems soothed by it- probably because there are some lovely ingredients in it: as well as kaolin and charcoal there is glycerin (very moisturising) and almond oil, and no parabens :)

When you first apply the mask it feels really warm (the 'warm bath' kind of warm, not 1st degree burn 'warm') which is particularly lovely on these cold winter evenings- (I'm not sure it would go down so well in the warmer months) and as you leave it on it gradually cools, it's very relaxing. What's great about this mask is that it doesn't 'set',  meaning it doesn't seem to sap the moisture out of my skin (which I think is what a lot of masks that claim to 'draw out impurities' actually do) and after removal my skin actually feels really lovely- almost to the point of not needing to moisturise afterwards!

The warming effect will also make your skin a little red for a while after using (so it's probably best to not use it if you're planning on leaving the house within the next hour) but this is a really good things as it means more blood is getting to the surface of your skin- and all the extra circulation is good for brightening dull skin and encouraging drainage.
I honestly cannot rave about this mask enough, my skin feels awesome (really clean and smooth)- and the warming effect makes it seem like such a luxury mask (although it is admittedly on the pricey side for 'drugstore' skincare). It's currently on a skincare 3 for 2 on 'indulgent bathing' so now is a good time to pick it up (plus it might be a good gift for someone!)

What's your favourite face mask?


                                                                                                          xGretalRabbitx

p.s. Happy St. Andrews day :)

p.p.s. It's December tomorrow!!!! Advent calendars!!!!! :)

Tuesday 29 November 2011

GretalRabbit Rambles...

After running out of time to post anything on Sunday (I was at a friends house for the weekend, and while I scheduled my pumpkin cupcake post for Saturday, I didn't think I'd be home so late on Sunday- I hate slow trains!) it really got me thinking about my blog...

I felt so guilty that I'd missed a post, that I'd let down the 67 wonderful people that care enough about what I write to be following my on GFC by 'neglecting' my blog for that day- especially when I arrived home to 6 lovely comments from you :) But in the end I remembered that this is MY blog- I am truly and genuinely thrilled that my reviews are useful and that people think my nail art is pretty- but ultimately I blog because I WANT TO; because I want a creative outlet, because I love all things make up and nail polish related and most of my friends don't share the same passion, and because I find writing relaxing- if no one read my blog I'd still be doing it everyday (or as close to everyday as I can manage).

That said, I really do appreciate all of the lovely people that 'follow' my blog and leave me kind comments, and I'm really glad that you enjoy reading what I write :) And of course, if you ever have any requests I will do my best to fulfil them, because although I do blog for myself, I really LOVE the sense of community and friendship within the blogging world, and I want to encourage that as much as possible- I've learnt so much from fellow bloggers and reading blogs is one of my main forms of 'entertainment'; and in writing my own blog I hope that I can contribute to that as much as I can.

I'm not entirely convinced I make all that much sense- (another reason I'm so happy that so many people read my blog- clearly I do (sometimes) make sense!) - but I suppose I am hoping that this post might help you understand why I blog.

Thanks again for being awesome, If you have any requests or questions please don't hesitate to let me know in the comments :)

And because this is such a long, text-based post, here's a couple of pictures of the awesome Lego Christmas tree I saw at St. Pancras Station this weekend (as usual I forgot my camera- idiot!- and missed out on taking my own pics, so these ones are courtesy of londonist) Anyway this tree is 10ft tall and made entirely from Lego bricks- how cool is that!


Also, this is my new motto:

I've just made a delicious batch of mince pies- recipe coming soon :)


                                                                                                         xGretalRabbitx

Monday 28 November 2011

Challenge Week 9: Rainbow Nails!

Time is flying by, and I'm already on to week 9 of my 52 week nail challenge. This week it's a rainbow theme and it took me absolutely ages to decide how to do my nails (seriously, I've been thinking about it all week..) but after perusing google images, I decided sponging a kind-of-gradient onto my nails would work as I could use two overlapping colours per nail :)


I used rather a lot of polishes for this nail art- as well as a sponge!

For the colours I used:

 
e.l.f. Light Red, Models Own Fuzzy Peach, Barry M Pale Yellow, e.l.f. Teal Blue,
Models Own Feeling Blue, Natural Collection Cosmic Crush.

I also used a base coat of Models Own Snow White, as well as two glittery top coats- first Collection 2000 Sparkle Top Coat, then e.l.f. Twinkle- to even out the gradient effect, and give a pretty rainbow glitter effect :)


Models Own Snow White, Collection 2000 Sparkle Top Coat,
e.l.f. Twinkle

I don't think it's my neatest work- though in my defence it's only the second time I've used sponges for a manicure, and hopefully I'm getting better. I rather like the design though- and I've not seen anything really like it as far as using a rainbow colour scheme.

Have you ever done a rainbow themed manicure? What design did you do?


                                                                                               xGretalRabbitx

Saturday 26 November 2011

Pumpkin Cupcakes :)

This week seeing as it was Thanksgiving on Thursday I decided to use some of my pumpkin puree and make some cupcakes :)

I chose (predictably) a hummingbird recipe, and it's another really simple one (and delicious too!)


You will need:

There is so much white and orange in this picture!


120g plain flour
140g caster sugar
1 tablespoon baking powder
1 1/2 teaspoon cinnamon
40g unsalted butter (room temp.)
120ml milk
2 eggs
200g pumpkin puree


1) Place the flour, sugar, baking powder, cinnamon and butter in a bowl and whisk together (slowly, or you'll make a mess!) until you get that strange sandy consistency.


2) Gradually add the milk while beating slowly.


3) Add the eggs, and beat into the mixture.


4) Stir in your pumpkin puree, and divide the mixture into cupcake cases.


5) Bake in a preheated oven at 107C/325F/Gas mark 3 for around 20 minutes (Mine actually took closer to 30, I think because my pumpkin puree is a little more liquidy than the canned stuff usually is) until springy and a skewer comes out clean.


Time for frosting! The hummingbird cookbook recommends using a cream cheese frosting (the recipe for which is in my red velvet cupcake recipe) but as I had no cream cheese I settled for butter icing- with my own little twist :)

You will need:

80ml milk
ground cinnamon
ground nutmeg
250g icing sugar
80g unsalted butter

1) Place the milk in a jug/bowl/cup with a little cinnamon and nutmeg- probably around 1/3 teaspoon of each  (sorry I didn't measure it!)

2) Gently heat the milk in the microwave- this will help the flavours infuse into the milk, I think it tastes better and more 'smooth' that way.


3) Place the icing sugar, butter and spiced milk into a large bowl, and beat together on a low speed until well mixed. Turn your mixer up to high and beat for several minutes until light and fluffy.


4) Spoon or pipe the icing onto your cooled cakes, and enjoy! :)


Yum!!!

Are you a fan of all-things-pumpkin? I really am- I can't wait to make pumpkin pie again :)


                                                                                             xGretalRabbitx

Friday 25 November 2011

Nail of the Day: Pearlescent Purple :)

After doing so many complicated and super-glittery manicures over the past few weeks, I decided to go with something a little more simple. I haven't worn No7 Lucky Lilac (which I bought at the beginning of the month) yet, so that was the perfect choice. In order to make it feel a little less 'springtime' I added a coat of a lovely duo chrome purple/pink polish- an ancient NYC one, called Scarlett for some bizarre reason. As always, I used my 'dream duo'- Sally Hansens Double Duty and Insta-Dri- as a base and top coat.


No7 Lucky Lilac and NYC Scarlett


I love love love this look, it's simple but still very pretty and shiny :) If you have any duo chrome top coat I really recommend getting them out for simple manis like this- great effects with very little effort!

What are you wearing on your nails at the moment?


                                                                                                  xGretalRabbitx

Thursday 24 November 2011

Top 10 Make Up Tips for Glasses Wearers :)

I started wearing glasses since the ages of about 10, and I've been getting progressively more blind ever since! I first used contact lenses about 6 years ago and I'd quite like to wear them a lot more, but a) I'm a little bit too lazy and b) I have an astigmatism which means contact lenses will be more expensive and I wouldn't be able to use disposable ones- and I'm not sure I like the idea of reusing lenses every day for a month... I'm currently planning to hold out until I can save for laser eye surgery, and in the meantime - I'm sticking with my glasses! Anyway, I've been thinking a lot recently about the way I apply make up, and how it differs when I wear lenses. I thought it was about time I put together a post full of my tips and tricks for applying make up for my fellow four-eyed friends :) (Apologies if this post isn't at all relevant to you)

I am very short sighted- which means that my lenses make my eyes appear a little smaller than they are (which is actually relatively small to start with,) so the tips I give in this post may not be so suitable for people who are long sighted (as those lenses tend to make eyes look larger.)

1) First and foremost, you NEED a magnifying mirror. It can look a little scary with glasses on (who likes to be able to see all of their pores in the mirror?) but once they're off you'll probably need the close up view! I prefer the small table top ones that you can flip/rotate to get the best angle. Get as close as you need to when doing your make up- I usually get about 2 inches away from mine!


I use an Ikea 'Trensum' mirror- £3.29 one regular and one magnifying side

2) With face make up (if you're as blind as I am) make sure you blend foundation/ concealer etc. with your glasses on- I always apply it and blend a little, then pop my glasses back on for a check and more blending- I always find that if blend without glasses I can't see well enough to get everything even and well blended. (how many times can I use blend in one paragraph...)

3) Under eye concealer is a MUST: glasses make under eye circles appear much worse then they are because they can cast a shadow on the area. Always conceal the under eyes really well, and perhaps use brightening products too. (If I don't wear any other face make up- I always use my e.l.f. under eye concealer.)

4) Eyebrows are really  important: they appear more prominent when wearing glasses as they draw attention towards the eye and eyebrow area. Always keep your brows neat and tidy: use a pencil/powder etc to fill them in if necessary- but keep it fairly subtle. I don't actually fill my brows in for two reasons; they are (oddly) darker than my hair colour (and I think enhancing that would look weird on me) and as I have black frames I think adding extra colour to my brows would compete too much with them.

5) With eye shadows, I generally stay with the lighter more brightening shades- remember that glasses can cast a shadow on your eyes, and make them look smaller- anything too dark will make your eyes look even darker and smaller. Perhaps it's to do with my eye shape as well as my glasses, but I always find that adding a crease colour is an essential step- I think that glasses can make my eyes look more one-dimensional that they are, and adding depth is very important (though again, you may want to avoid very dark shades) However, eyeshadow choice and placement will depend on your frames a lot: with lighter frames you can get away with more dramatic eyeshadow, but darker frames often create enough drama on their own.

6) I think eyeliner is another absolute essential. Behind glasses my eyes really lack definition, and eyeliner (or eyeshadow as a liner) helps enormously- of course you do have to be careful as it can look harsh, especially on the lower lash line. I always prefer brown (I love my e.l.f. Cream Eyeliner in Coffee) as it's less harsh on my pale skin (though if you have darker skin I'm sure black could work for you just as well)

7) If, like me, you have straight or long lashes (and actually, even if you have naturally quite curled lashes), always curl them- there is nothing more annoying than having your lashes touch your lenses all the time- flaking off your mascara in the process- plus adding curl opens up your eyes, making them appear larger.

8) With mascara, avoid clumpy formulas, as any clumps can be exaggerated behind lenses. I think it's generally better to use waterproof or very flake-proof mascaras, as flakes can quite easily get stuck to the insides of your lenses.. Also, I like to make sure I allow mascara to dry before putting my glasses back on, I find that it tends to smudge if I don't.

9) Apply all cheek products- blusher/bronzer/highlighter with your glasses on. The positioning of your frames will probably effect where you should place products. I think it's easy to get products too high up on the cheeks when I apply without my glasses. This also helps with the 'blending evenly' point I made with tip 2- I find it much easier to get my face even if I can see it all at once, and I can't do that without glasses!

10) Lip products are great to add 'balance' to the face, but if you want to go for darker lips, really really play down the eye make up- even without glasses darker lips are usually paired with lighter eye make up, but as glasses already draw attention to the eyes, if you want to focus on the lips your eye make up should be even more pared down.

Above all: practise and experiment! Like everything make up related there are no absolute rules, and everyone will find that different things will work for them- don't be scared to play around and find out what works via trial and error.

I really hope you've found these tips helpful :)

Do you have any more make up for glasses tips for me? Share your tips in the comments!


                                                                                                     xGretalRabbitx

Wednesday 23 November 2011

If money were no object #5- skincare and nail polish...

What with all of the 'Christmas gift ideas' and Christmas collections floating around at the moment, I've discovered yet more items I'd love to have, but are somewhat out of my price range....


Firstly, the Lancome 'All I Want This Christmas' luxury advent calender.


It's just like a regular advent calender, but instead of cheap chocolate each window hides a little make up or skincare item in miniature. It retails for £70 (from Selfridges- though it's already sold out)

How much fun would a make up advent calender be. I'm actually contemplating making up my own! :)


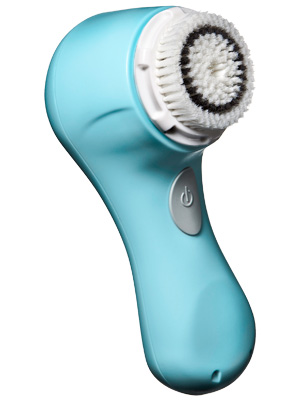
Second on my list is something I've been thinking about for a while: the Clarisonic. I'm sure it would be the most amazing thing for my skin, and I've heard SO many good reviews on it- I'm pretty sure that everyone who has one raves about it!


However, at £155 (from the clarisonic UK website) or £115/£120 (depending on colour) for the Mia (sold by clarisonic on amazon but not their website...) I don't think I can really justify it at the moment. I know there are quite a few cheaper alternatives, but I've heard mixed reviews on these. What are your thoughts? Any recommendations? Or should I just save my pennies for a Clarisonic Mia?


There are rather a lot of Chrismas nail polish releases that I really would love to get my hands on, but in this case not only are they expensive, they are also pretty hard to find in England. Sometimes I think I'm glad I can't get cheap OPI and China Glaze here though, can you imagine how much nail polish I'd have?

OPI released their Muppets collection a few weeks ago, and in that is the most glittery, colourful sparkly nail polish I've ever seen: Rainbow Connection:


Photo courtesy of Swatch and Learn


China Glaze have also just released a large Christmas collection, and I'm rather in love with Snow Globe...


Photo courtesy of Cara Robinson

Snow Globe actually reminds me quite a lot of the new glitter I bought recently, I'll have to experiment with it and see if I can create some sort of Snow Globe look-a-like :)


So what items are you currently lusting after?


                                                                                                       xGretalRabbitx

Tuesday 22 November 2011

Challenge Week 8: Taping! (and a taping tutorial)

I've only made a few attempts at taping before (documented here and here) so I was quite excited about this weeks 52 week nail challenge theme as it gave me another excuse to test out some fun taping patterns: I saw someone who used craft scissors to tape a zig-zag pattern, and as I have several (hundred?) pairs of craft scissors in various shapes I thought I'd give it a try.

Also, ColourByMakeup requested that I do a taping tutorial, so I thought this was the perfect chance (sorry it's taken so long!) and while I'm certainly no expert I will take you through the taping method I use, and share the tips and tricks I've picked up along the way, I hope you find it helpful  :)

Start with a base coat (I've gone for a blue theme, so I'm starting with one coat of Models Own Beth's Blue) Make sure it is absolutely completely totally dry before attempting to tape- or the tape will smudge it or rip it all off! You may want to give it a fast-dry topcoat to speed it along.


Models Own Beth's Blue

Next you need your taping 'equipment': tape, scissors and some junk mail (basically any shiny paper) The paper will be explained a little further down, but isn't at all necessary for regular straight lines with normal scissors.


Rip/cut off a small amount of tape, and de-sticky it on the back of your hand: stick it on then peel it off a few times- until the tape will still stick to your skin, but wont pull at your skin when you peel it off.


Now you can skip this step if you want straight edges (If you want straight lines you just need to snip off a section of tape, de-sticky it and use the straight edge to tape.) but I found that my craft scissors didn't cut the tape very well- they just aren't sharp enough and the tape sticks to the wider bits of the blades, so I stuck it to my shiny paper (shiny is better, as the tape sticks less).


Then used the craft scissors to cut both the paper and tape.


And peeled the tape off the paper, leaving a cleanly-cut strip of tape with a nice wibbley line, ready for taping!


Now you need to place the tape over your nail. I always have issues getting the angles even (which is why all of my taping so far has been at all different angles...) so if anyone has any tips please leave me a comment and share your knowledge!

Make sure that the tape is flat against your nail, especially at the edges (where it often sticks to the cuticles and doesn't stick all the way down the nail) so you might need to press it in at the edges using another fingernail. Once the tape is firmly on and in place, you can paint the nail that isn't covered in tape. Be sure to paint right up to the edge of the tape- if you've stuck it down properly the polish wont seep under, and you'll be left with a nice clean edge.


Next is the part I find most tricky: you need to remove the tape quite quickly (if you allow the polish to dry it will stick to the tape and it'll peel off with the tape) but carefully (so you don't disturb the wet polish.)

I tend to peel slowly and gently from one side to the other, keeping the end of the tape in my hand down and close to the nail (which gives it more control). I wish I could take a picture of this, but I don't have enough hands- I hope you understand what I mean!


If necessary, clean up any rough edges or patches etc. (in my haste to take pictures and remove the tape, I dented the wet polish, but filled it in with a new blob of polish- you can barely tell, right?) with polish, and carry on taping the other 9 nails.


I used Primarks Glo Baby Glo in Cornflower (perhaps I do too much baking, I just misspelled cornflower as cornflour...) as my main taping colour (shown above) and- not being quite content with just one colour- I used Models Own Pro in Midnight to tape the very tips, adding a bit of sparkle :)


I think my middle and ring fingers are my favourite, I like the two layers of evenly spaced taping on my ring finger, but I also like the cross-over pattern on my middle and index fingers :)

I really love taping, although it's a rather simple concept you can create so many different patterns and shapes with it. I'm currently thinking up a wintery themed taping design, involving a snowflake shaped hole punch in my craft box... watch this space!

If you have any more questions, don't hesitate to ask, I hope you found my hints and tips to be useful- let me know if you post your own taping manicures! :)


                                                                                                 xGretalRabbitx